Each Thursday on the EiE Blog, we share helpful tips for teachers.
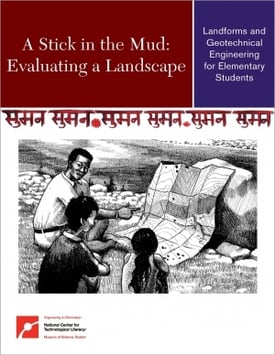 Do you teach the unit “A Stick in the Mud: Evaluating a Landscape”? Here’s a tip from one of our professional development collaborators, Laura Keeling of Tully Elementary in Louisville, Kentucky.
As the school’s Learning Lab STEM teacher, Laura sometimes works on the same EiE lesson with several groups of students in a single day. She shares a simple way to cut prep time for one activity in half—AND use fewer resources.
Making Models to Evaluate a Landscape
The activity in question is Lesson 2 of the “Landscape” unit, which explores how geotechnical engineers find the best place to anchor a building foundation by evaluating the layers of soil at a building site. Students conduct their own “site explorations” by comparing two model building sites.
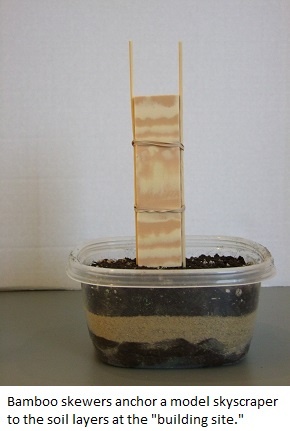 The models are shallow containers, filled with materials representing layers of soil and substrate. Students take core samples to learn what soil types are present at the model sites, then test a site to see if they can successfully anchor the foundation of a skyscraper during an earthquake. (A wooden block, shown at right, represents the skyscraper; students shake the models to simulate an earthquake.)
One model building site has three layers (soil, sand, and clay); the other has four layers (soil, sand, clay, and “bedrock”—actually, florist foam). If a typical class has about 24 students, and you assign them to work in groups of three, with each group testing one of the two sites, you’ll need 8 model building sites (four of each type).
If you have four different classes coming through your STEM lab each day, as Laura does, you'll have to prepare 8 x 4 = 32 containers in all. That’s a lot of soil, sand, and clay—and a lot of spooning and smoothing of layers!
Get More from Your Models
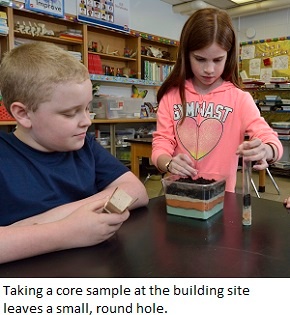 Laura has a strategy for making one model last for two classes or more (depending on the size of the container). She anchors a strip of masking tape on the rim of the container and runs it down the length, dividing it in half. Then she directs student to use one side for core samples, the other for the foundation test. When students in the first class take their core sample, they place a large, brightly colored pompom in the hole that’s left behind.
Students in the next class use the same model. Large-size pompoms are big enough to keep the walls of the hole from collapsing, and they also make the sample site easy to see. Students in the second class simply avoid the pompom when they take their core sample. If the container is large, you might be able to have three or four groups re-use the model.
Even if you’re only making models for a single class, dividing them in half with a strip of tape is still useful. Laura says, when she presents students with a smooth, fresh container of soil, they almost always take the core sample in the dead center of the container. By dividing it in half, you prompt students to take the core sample on one side and test the skyscraper on the other. There’s no risk they’ll try to anchor the skyscraper foundation in a gaping hole.
USEFUL RESOURCES:
Watch this EiE "How-To" Video for "How to take a Core Sample"
Watch these EiE Classroom Videos to see students evaluating a building site:
- Landscapes Lesson 2 at Laura Keeling's school in Lousiville, KY
- Landscapes Lesson 2 at a school in Bremertown, WA
Do you have a tip for EiE teachers?

Engineering is Elementary is a project of the National Center for Technological Literacy® at the Museum of Science, Boston.